This is a sponsored conversation written by me on behalf of Cricut. The opinions and text are all mine.

Raise your hand if your kids have already seen Frozen 2? It’s no secret that Disney runs through our blood in this house. And like many of you, I live in a house that loves all things Frozen. After Frozen 2 recently came out that love was definitely brought back in full force for this holiday season.
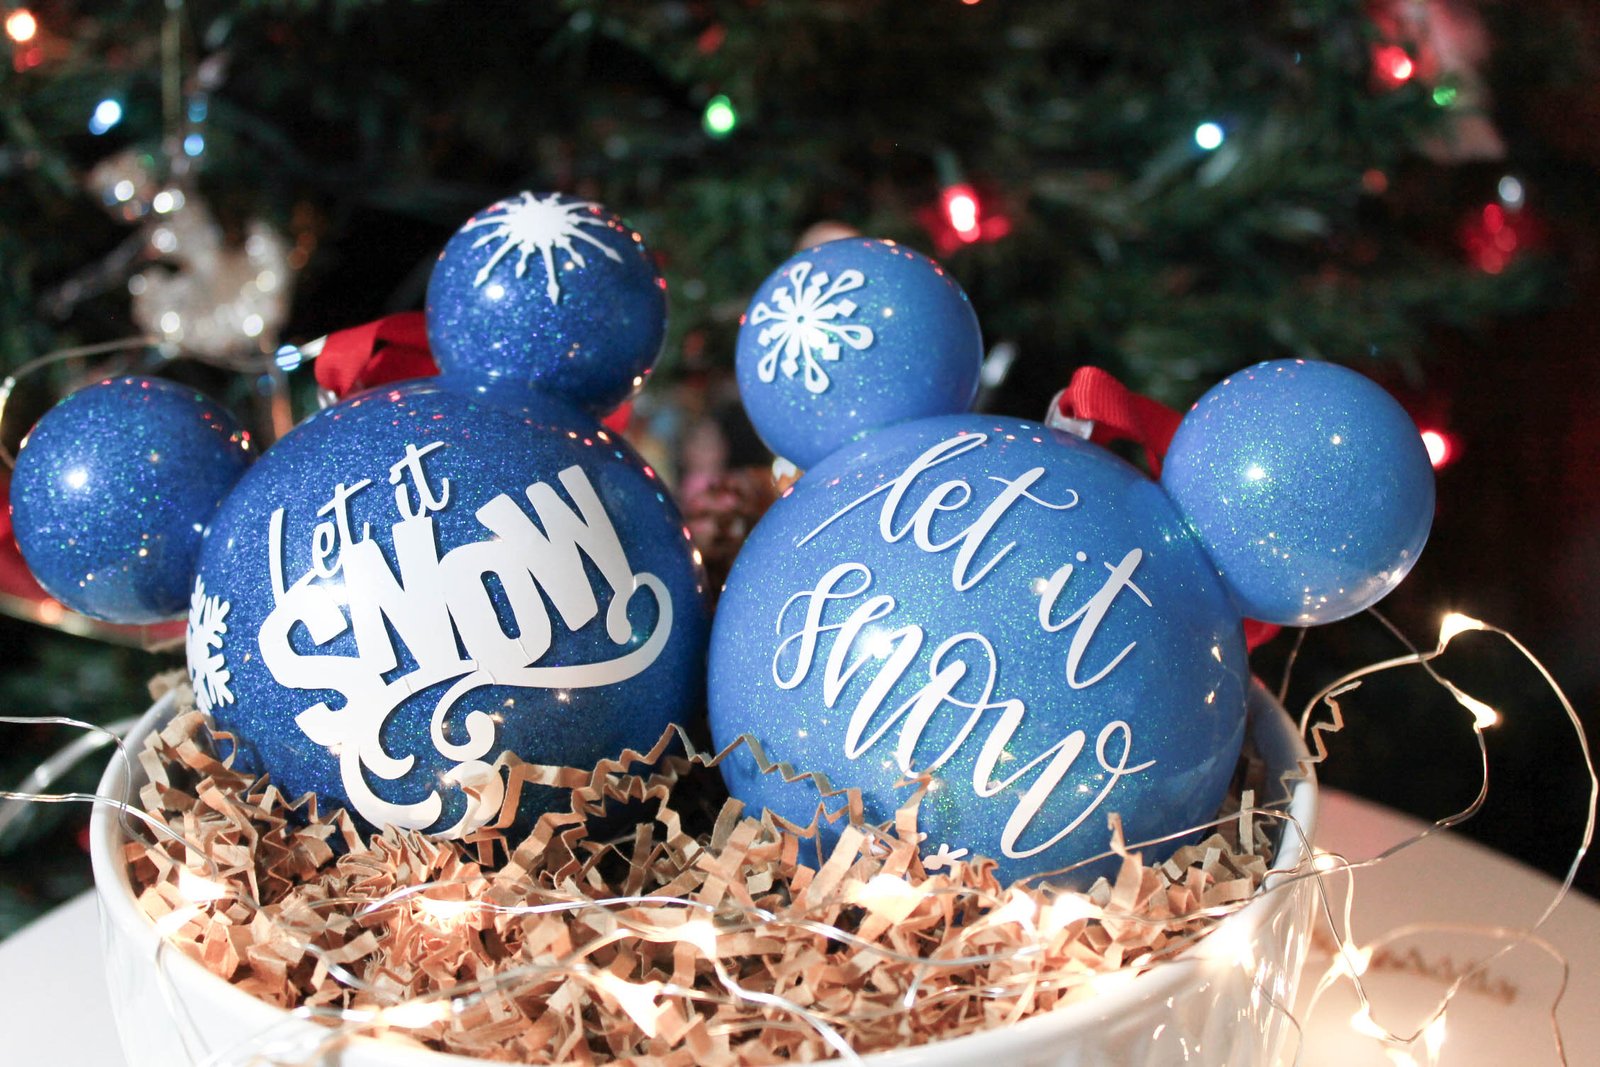
Which is exactly how this adorable up-cycled Frozen inspired Christmas ornament idea came to be. While standing in line at the Disney store, to spend $10 to get the free collectors key, these bad boys were $10.95 and included a pair of adorable socks inside. While Mumfection and I stood in line in the middle of the busy Disney store at Metropolis at Metrotown we knew there had to be a way to re-use the fun bauble the socks came in. Enter the Frozen 2 Inspired Ornaments – made of course, with my Cricut Explore Air 2!

The socks inside were adorable, and definitely served their purpose but with new Cricut ideas bouncing around in our heads with a new machine at home we knew there had to be a way to re-use these baubles to make something we’d be proud to display or to gift to a friend (while still keeping my holiday socks!.)
DIY glitter ornaments are all the rage right now with makers, with some beautiful designs popping up all over Pinterest and Handmade groups, but they are often made with the large circle or flat circle ornaments. Not nearly Disney inspired enough for our crazy selves, so when we spotted these clear baubles, we knew this was it. With a million Cricut inspired ideas running through our head, we couldn’t wait to try these out!


Ready to make it? Here’s what you’ll need for the Frozen 2 Inspired Upcycled Ornaments.
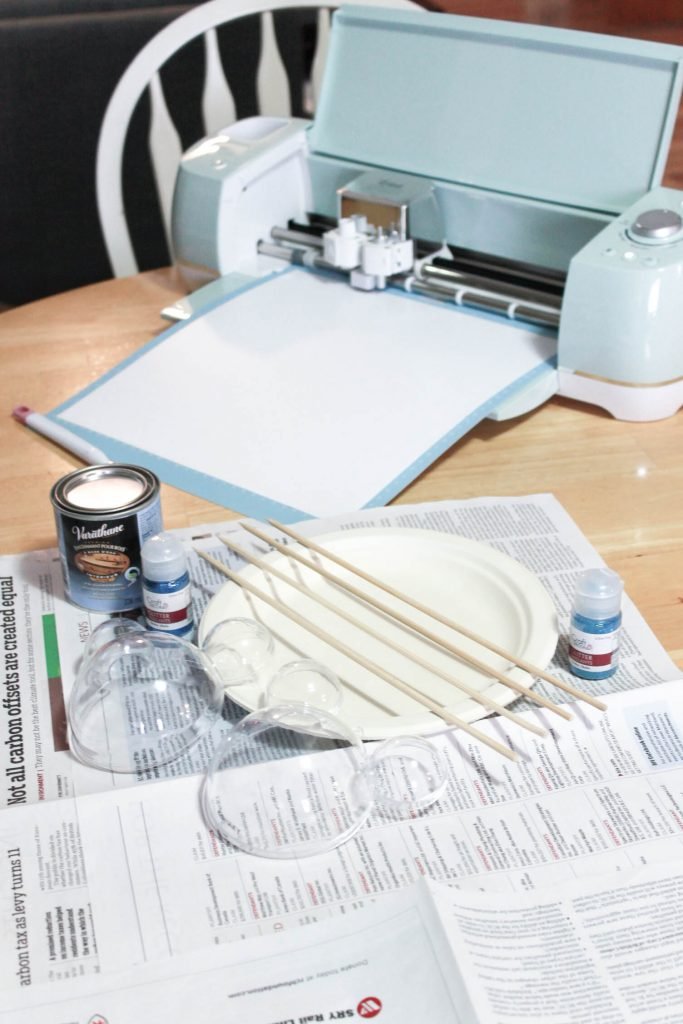
- A Cricut Machine – Ours is an Explore Air2
- Cricut Design Space
- Cricut Access – you’ll want this for access to the premium fonts and snowflakes
- Weeding Tool
- White non-permanent matte vinyl
- Mickey Head Plastic Ornament – gained from an amazing sock purchase {grab yours at your local Disney store or online at ShopDisney.com}
- Ultrafine or fine blue glitter
- Transfer tape – scotch tape and clever weeding if you are in a pinch also works fine for this project
- Wood Finish – we used Varathane wood finish for interior, a little goes a long way so don’t buy too much.
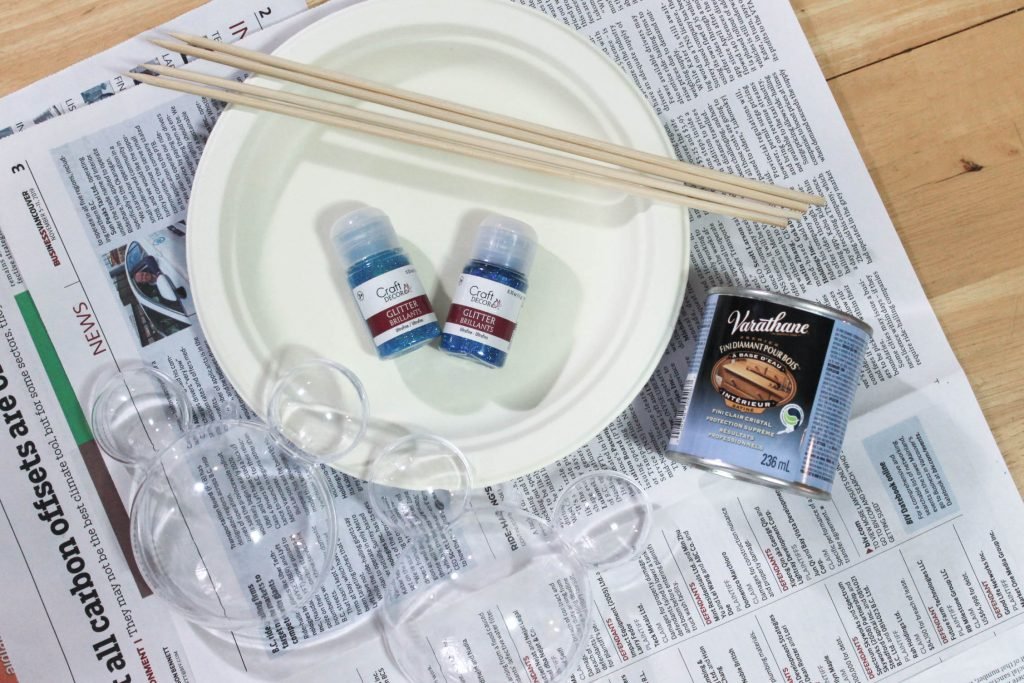
- Paper cups & plates
- Wooden skewers
- Newspaper or something similar to protect your work surface
Let’s get making!
First, make sure you are working in a well-ventilated room or plan to coat your ornaments outside. Cover your work surface completely with something protective before starting.
- Take your Mickey head sock ornament, remove the hanging ribbon and separate the two sides.
- Wipe down both the inside and outside of the ornament to remove any residue or fingerprints.
- Pour about a tablespoon of wood finish into each half of your ornament starting in the largest part. Slowly work it around the inside of your bauble. You may need to roll it over the same spot a few times for it to start to cure and stick. If you see any blank spaces, pour more finish inside and repeat the process until fully coated.
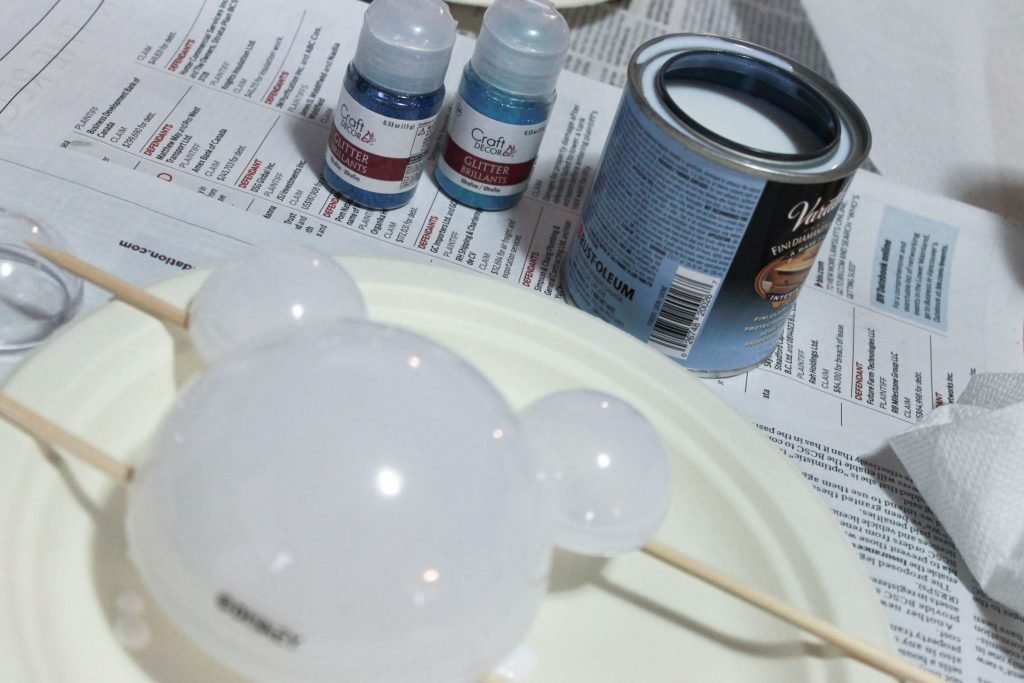
- Once your bauble is completely coated and opaque, flip them open side down onto your skewers over your paper plates and let the excess drip off. This can take between 5-10 minutes, the finish will start to turn tacky and at that point you can gently wipe off any of the pooled finish in the grooves of the ornament. If you skip this step, your finish WILL drip and it will be noticeable in your ornaments, this is a very important step!
- Once all excess is fully dripped off pour the glitter into the halves – moving around to get full ornament coverage. We recommend doing this over a second paper plate to catch any excess spillage (there will be some!) so you can re-use it easily.

- Leave to dry over the drip plate while you begin your design printing process.
- Open up your Cricut Design Space and choose your ideal snowflakes and “let it snow” graphics. Remembering to use your Cricut mat as a guideline for sizing. {You can find our faves here}

- Place your vinyl sheet onto your Cricut Mat, good side facing up.
- Cut out your snowflakes and wording with your Cricut machine. Pro tip: once you click “make it” in Design Space you can move your snowflakes and wording around to save on vinyl for future projects.
- Peel back vinyl to reveal your design making sure to weed (aka, remove) out all the little bits and pieces that show the detail in your designs.
- Put the two halves of your Mickey Head together and close. The floor finish will act as a glue to hold both halves together.
- Use your transfer tape to pick up each of your snowflakes etc… and place on your bauble wherever the Frozen inspiration hits.
- We found that thin wording worked best on this shape, if you plan to use thicker words then cut a few small slits around your wording on the transfer tape to help it bend around the shape easier.
- Once complete tie your red ribbon back on and hang on your Christmas tree!

This was such a fun and easy project to make. This is a great way to upcycle something you would otherwise throw away. With this easy DIY, you can turn these unique baubles into something you’ll be proud to put on the tree each year. Not into Frozen 2 next year? The non-permanent vinyl is easily removable and you can replace it with something new each year to match current themes or favourite designs.
We hope that this will inspire you to get that Cricut out and start creating this holiday season. Don’t forget, if you don’t already have one, to put that Cricut machine on your Christmas list; then you can create amazing one of a kind items just like this one. The best part is you can do it all within the comfort of your own home whenever the inspiration hits. Maybe even in jammies or with some friends over for tea and laughs.
Don’t have a Cricut machine yet? What sort of friend would I be if I didn’t give you the heads up that the Cricut Explore Air 2 is on sale right now starting at $199, from now until December 31st, 2019! I think Santa will agree, you need one for all the Disney & Frozen 2 inspired projects your kids will want created once they see these baubles.
Love it? Make sure to pin it for later! And don’t forget to check out our other Cricut creations.

[This post contains affiliate links]