This is a sponsored post written by me on behalf of Cricut. All opinions are 100% mine.

It’s been an interesting 2 months around here. It felt like everything happened overnight and suddenly we were homeschooling, pajama-wearing most of the day family. Prior to the self-isolation, I stocked up on just about every craft I could find at our local dollar store but we quickly discovered that the crafts that were the most fun, were the ones that A could personalize with me.
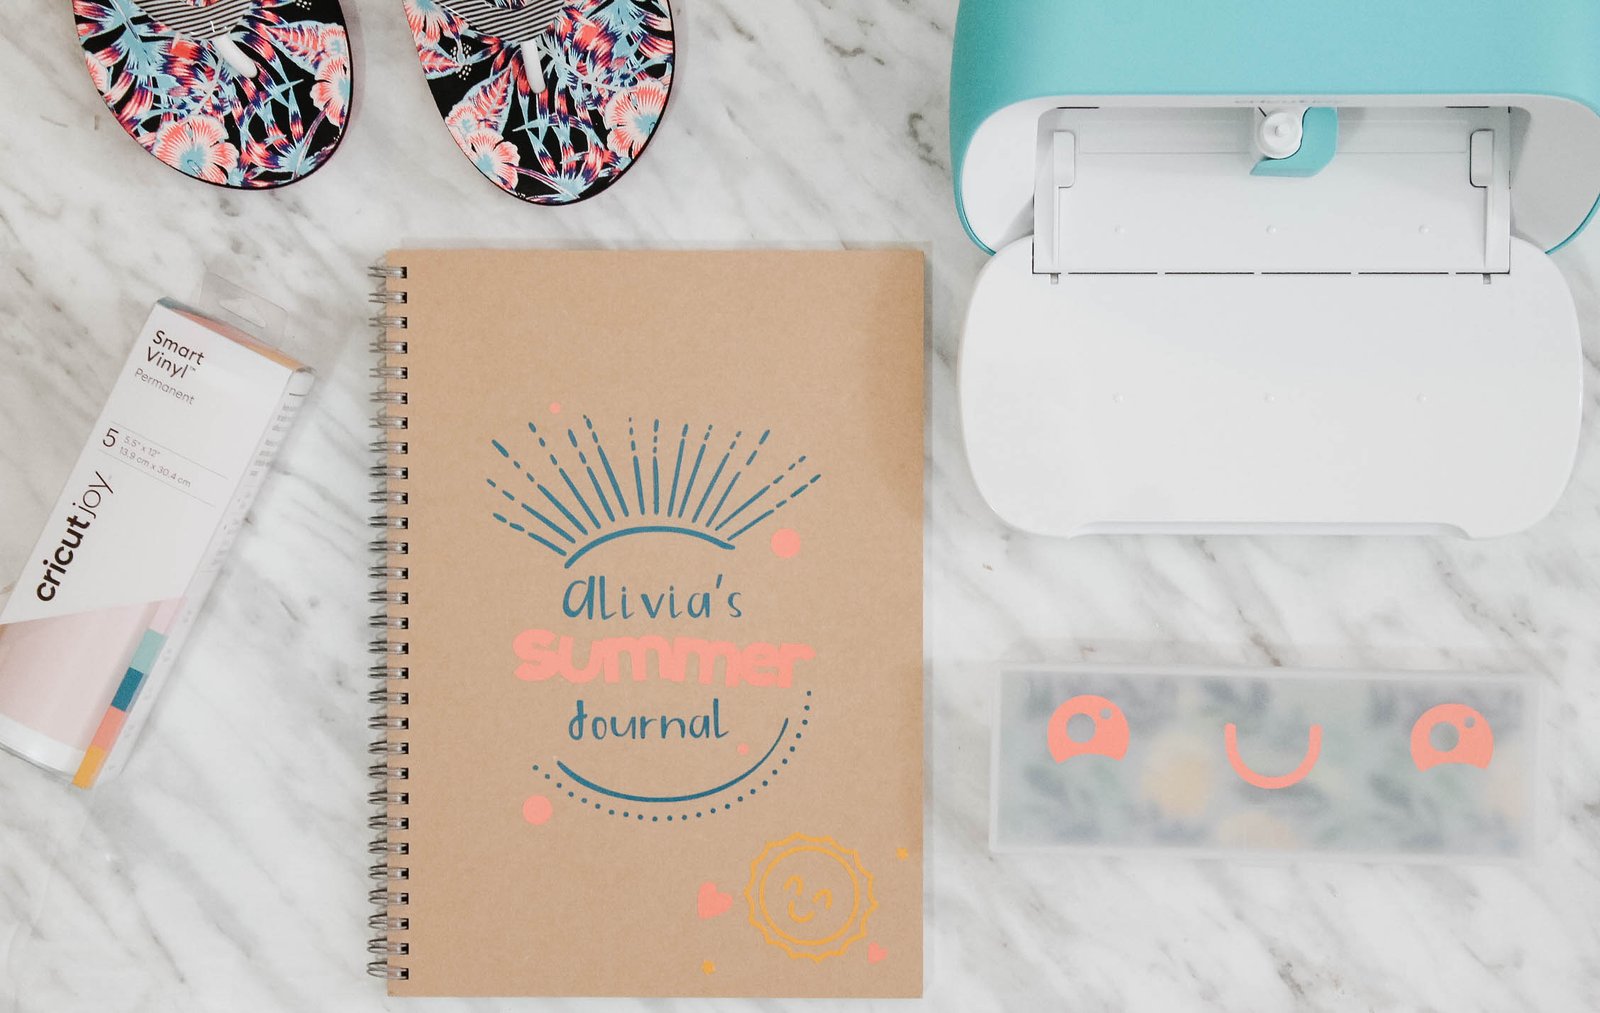
I had just about everything we needed on hand to create a beautiful, custom journal that A could use to write, draw, create, scribble and pour her creative heart into and thanks to our Cricut Joy, a way to keep the creativity going. I’ll be upfront with you. We live in a tiny house where space is at a premium. I love my Cricut Explore Air 2, but I usually, only haul it out for bigger projects. When the Cricut Joy landed on my doorstep I couldn’t get over how portable it really was. It’s small enough for me to leave out every day which of course, also keeps me reaching for it more often.
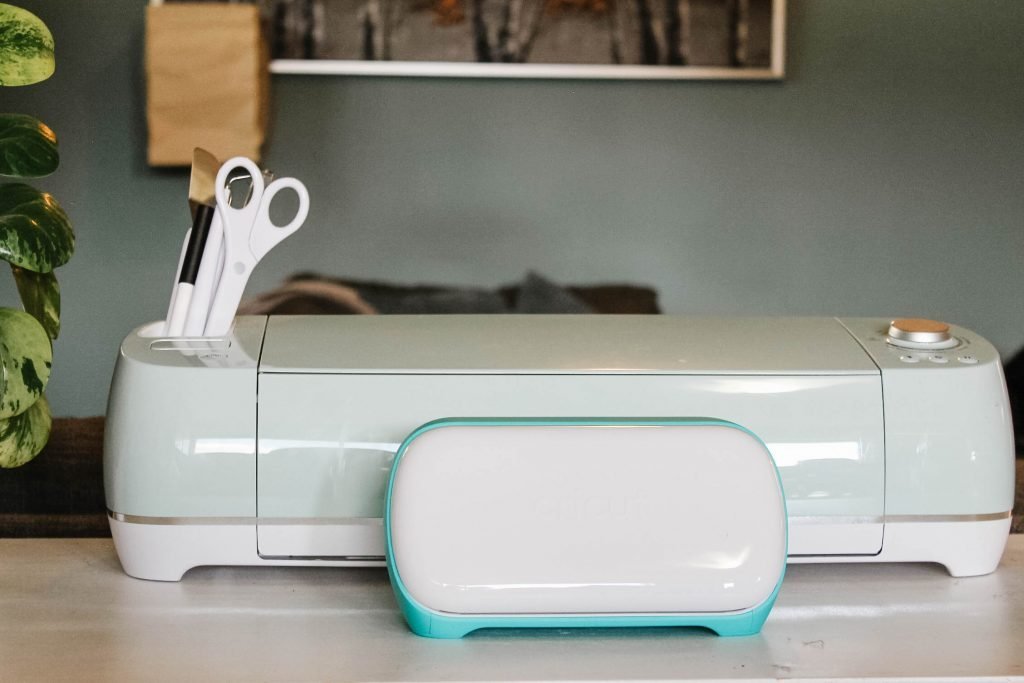
Before I dive into our project, I want to share a few things that have me hooked on using the Cricut Joy. First off, the Joy is sort of an eco-system in itself in the Cricut line. It has an entire line of products that only work with the Joy such as newly designed mats, smart vinyl that allows for the ability to cut without a mat, new shorter pens, and an incredible new card creating line to make creating cards on the fly a snap. It’s an incredible entry-level cutting machine for easy around the home projects. It also packs enough creative punch to be able to create more intricate designs as you get more comfortable in your crafting. Whether you are a new DIY’er or seasoned crafter, the Joy offers a lot for such a tiny machine.
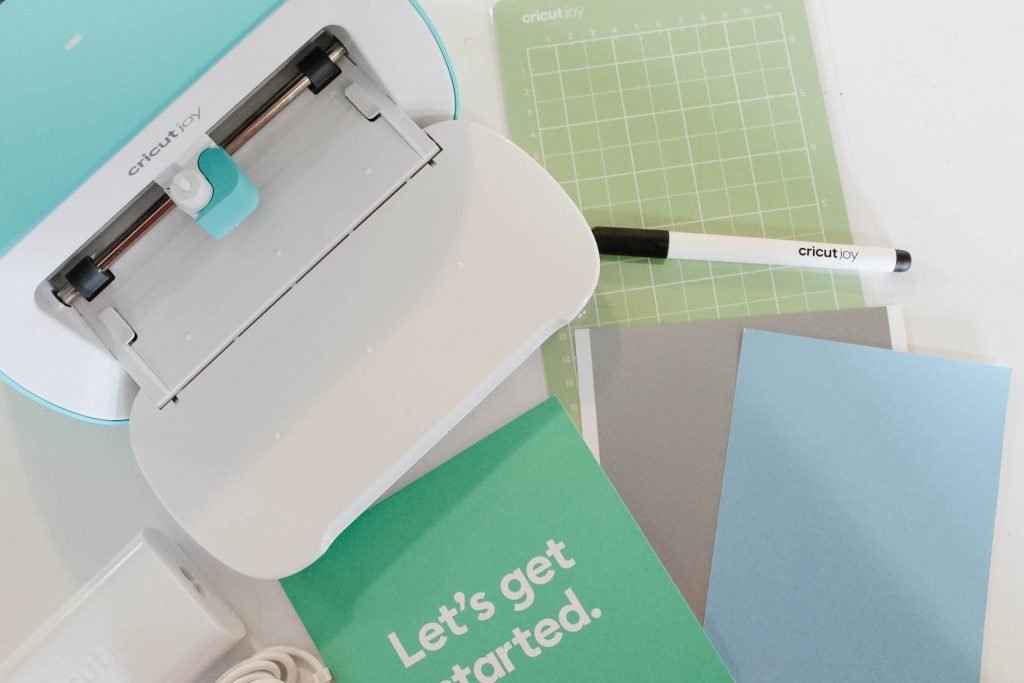
I’m not a seasoned crafter by any means! I really enjoyed that the Joy was easy to set up and use straight out of the box. The Joy does not use a USB cord unlike the other machines either. Everything runs seamlessly on bluetooth from your devices, you can create from your laptop, tablet, phone, basically anything with bluetooth and Design Space so that was a huge selling point for me.

We used designs and fonts available through Design Space, and learned a few things about the Joy along the way! First off, the maximum size continuous cut project the Joy can create is 4.5 inches by 4 feet, we were thankful that Design Space does a check for you when you set your machine and will tell you if you are outside the allowable size. When you’re ready to create your project, Design Space will tell you the size of the material it anticipates you needing to complete the project. So you can cut it in advance and hopefully lessen waste.
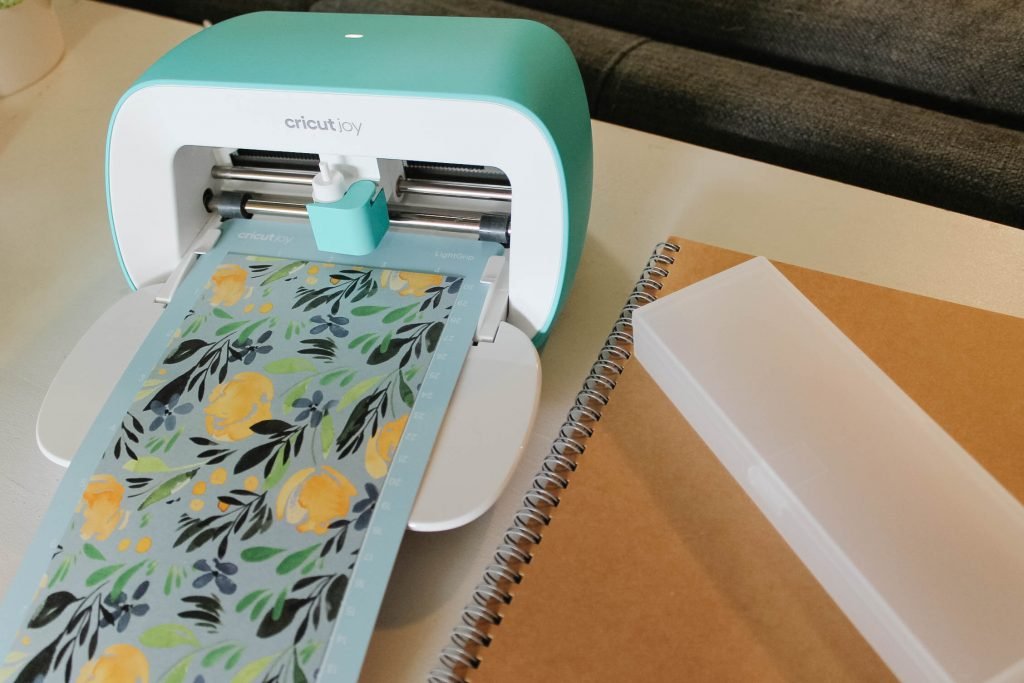
We also used the new Smart Vinyl, that unlike the regular vinyl available has registration marks built-in that the Joy recognizes and used to cut without a mat. Super cool feature, and makes the Joy even easier to travel with when you can just pack rolls of vinyl!
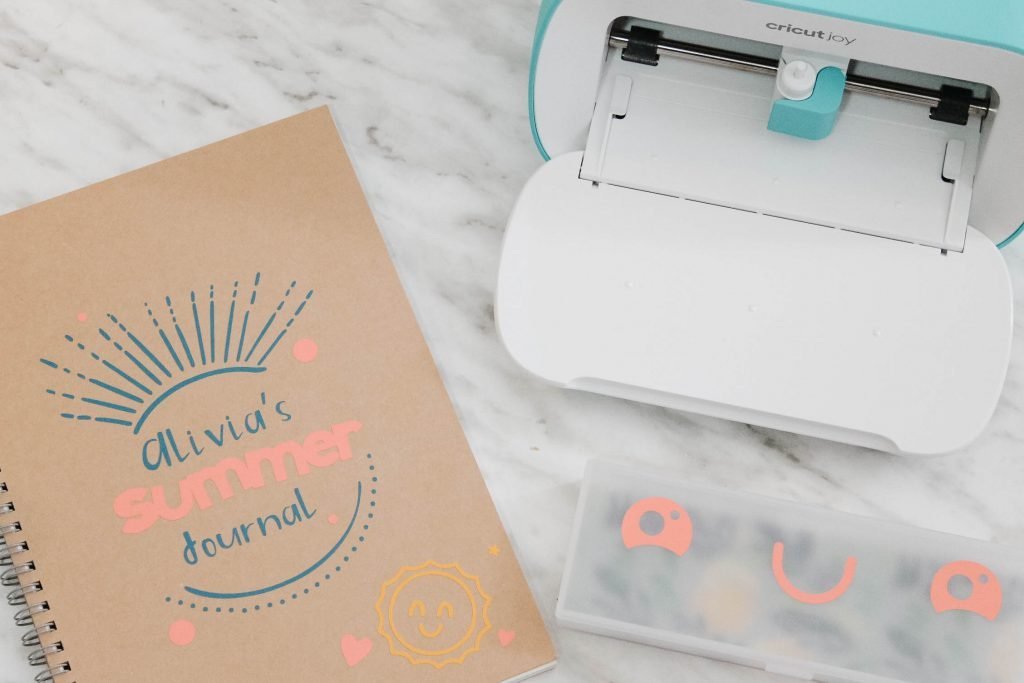
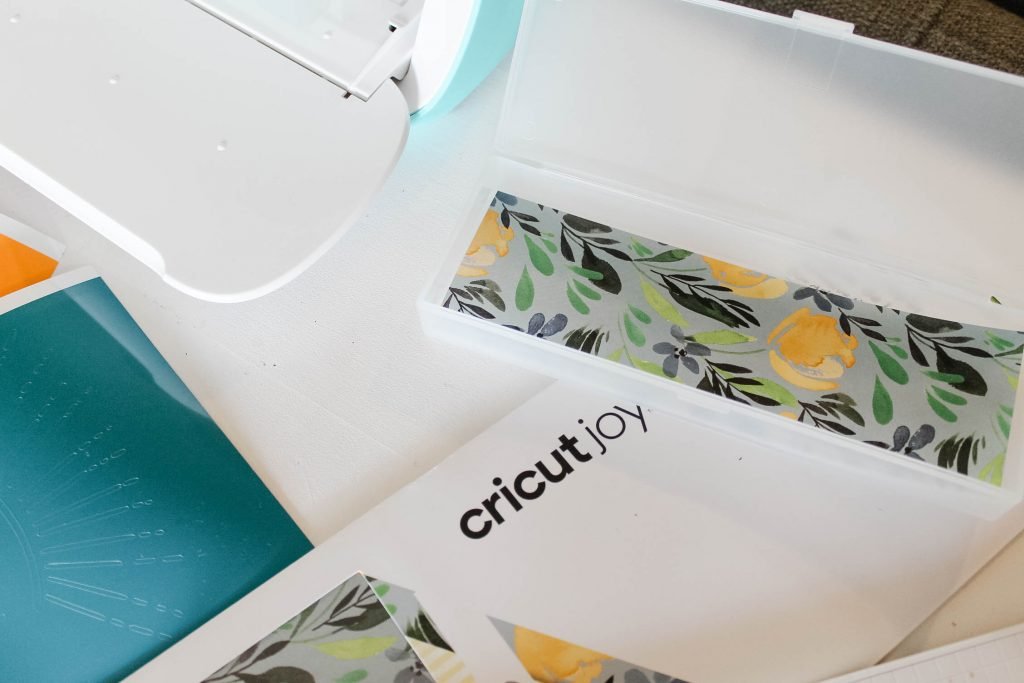
Alright enough about the amazing features, let’s chat about the projects we made! Our first project with the Cricut Joy was an easy one, so easy that Alivia was able to help me pick a few designs to personalize her new journal. I started with an inexpensive hardcover spiral notebook and a clear pencil case. I was able to find both of these at the mall for under $6 at Muji, but you can really use any hard book and blank pencil case.
Here’s what you’ll need:
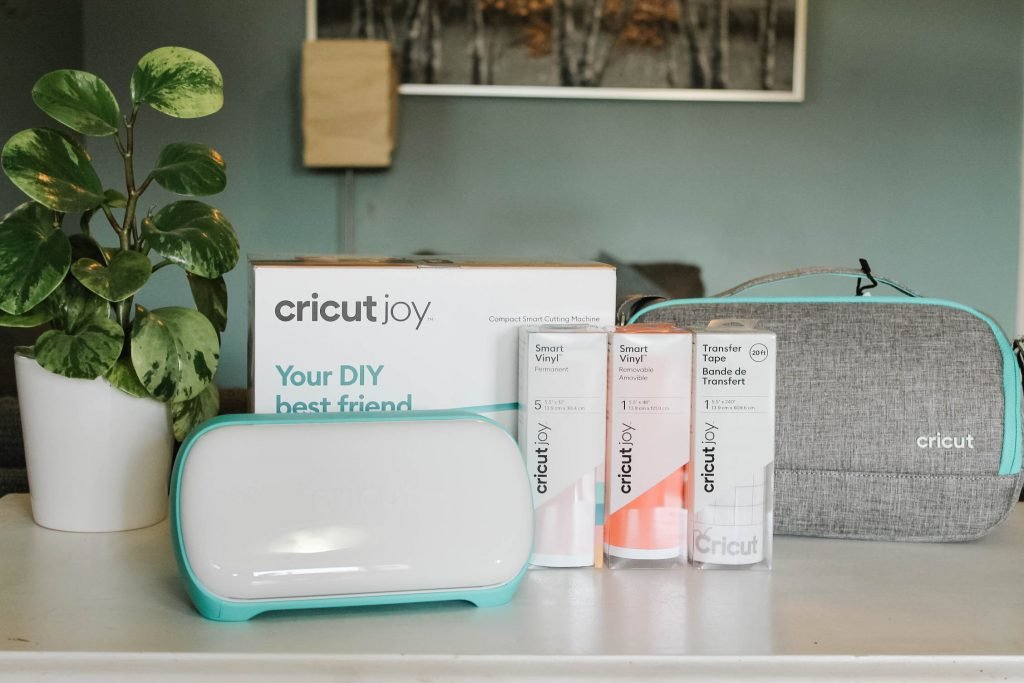
- Cricut Joy Machine
- Cricut Joy Smart Vinyl Permanent Vinyl (we used Beachside Sampler)
- Deluxe Paper Adhesive Backed (we used In The Grove) *
- Hardcover plain cover journal/notebook
- Plain pencil case, or a pencil case with a design you can cover-up
- Weeding tool
- Transfer tape
- Cricut Design Space
- Cricut Access
- Optional add-on, we used the Cricut Joy Deluxe Paper to line the inside of our pencil case. If you choose to go this route and cut the shape to fit inside, you’ll also need a light grip mat for the deluxe paper. Completely optional, and you can cut this by hand with a Cricut paper cutter if you find it easier.
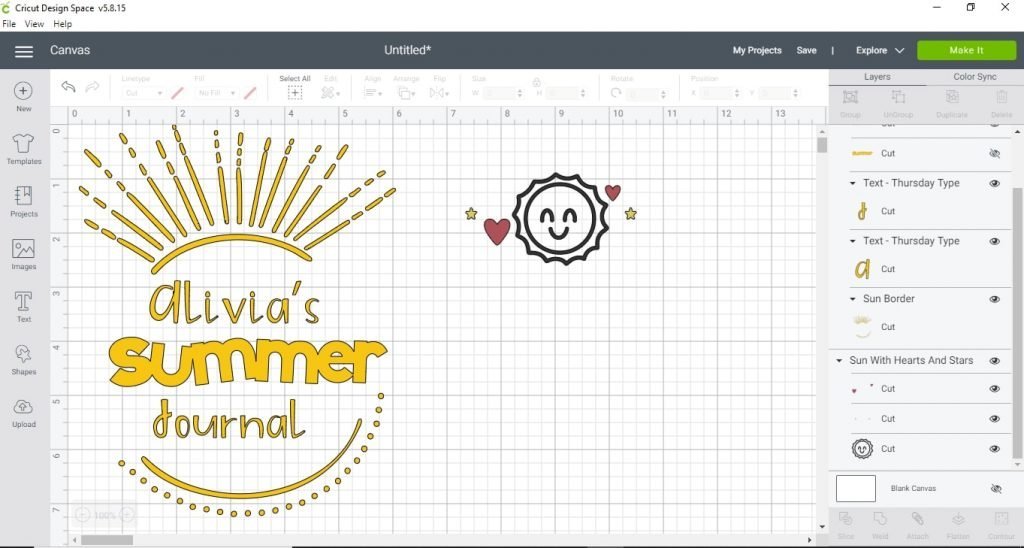
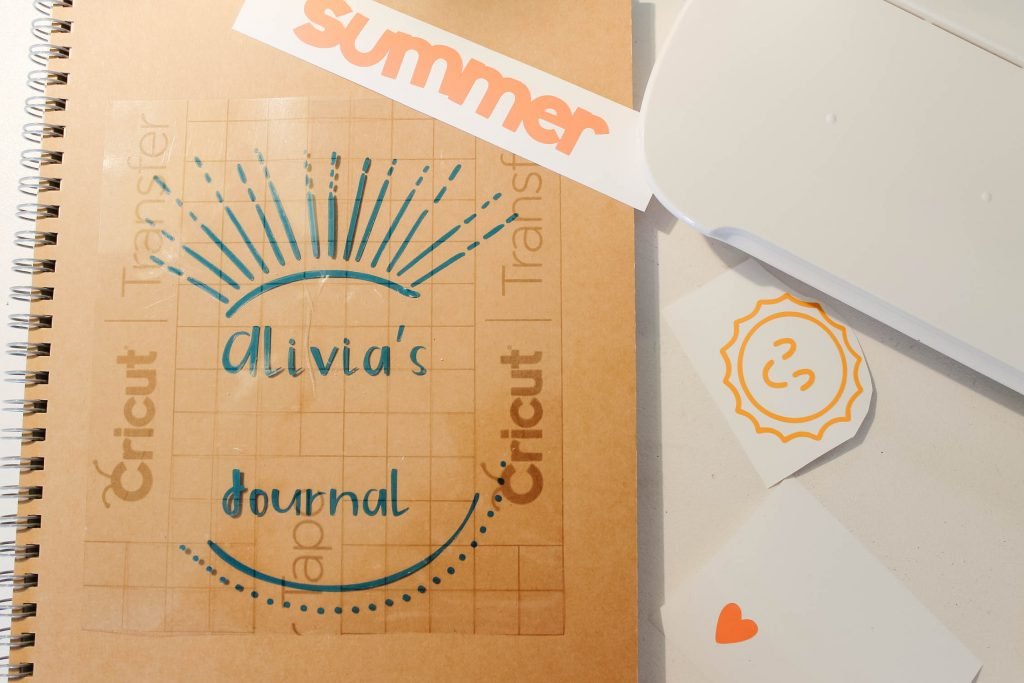
Start by opening up the Summer DIY Journal in Design Space. Click to customize and double-click on Alivia’s name to change to whichever name you’d like to use. After that, click and hold from the bottom left corner of the sunbeams and drag up to the top right corner. Once that is selected, look to the bottom right corner of Design Space and find “attach”. Attach this part of the project together.
- The “Attach” function tells Design Space you want these items to cut as one, as displayed. This makes it easier to weed and transfer to your project later
Customizing wise, that’s all you need to do! If you choose to add additional images to cut, you’ll need to move them below the main attached image so you don’t receive the “project is too wide” error.
Once you’d happy with everything, head up to the right corner and select “Make It”. The next steps will guide you through sorting your project to your different mats. All this means is that you are sorting them so they cut on the colour vinyl you want them to cut onto.
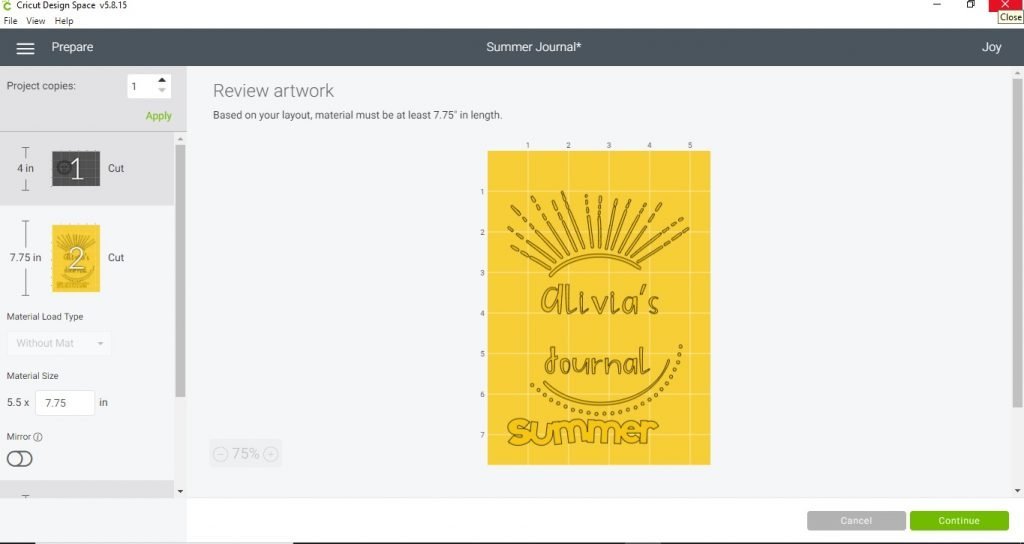
On this page, you can sort each part of your project to different mats. Start by clicking on Summer and 3 dots will appear above it. Click those dots and select “move object” to sort it over to the hearts mat so it cuts out the same colour as your hearts. This sort feature also lets you maximize the amount of space you use on a cut so you don’t waste any materials.


Once you’re happy with where everything is on your mats, you’re set to create! Start by selecting the first mat you want to cut. For me, I always choose the one that will take the longest to weed so it keeps me busy while I wait. You’ll want to load either your smart vinyl into your Cricut Joy or your mat if you’re using regular vinyl and click continue.
- Weeding is removing parts of the design you don’t want or need, such as inside letters or intricate designs.
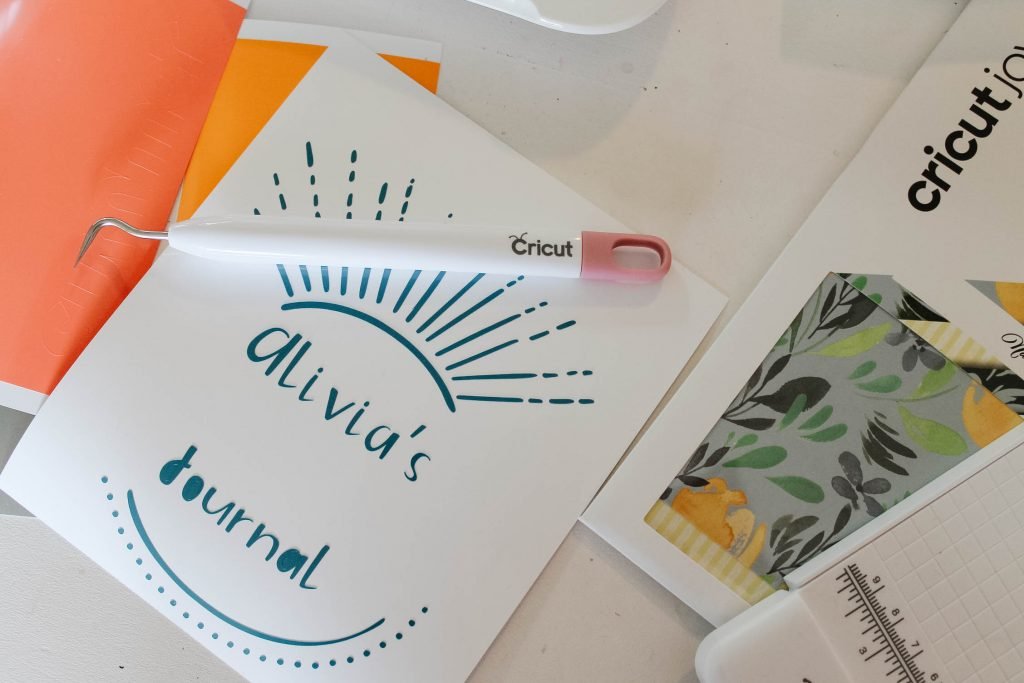
Once you’ve cut your first part of the design, grab your weeding tool and start removing the excess part of the design. You can see in this photo that the inside of the J, O and A need to be removed. Gently pick them out with a weeding tool or tweezers.
Once you’re happy with your weeding, grab a sheet of transfer tape the size of your design. Peel off the backing and place it over top of the entire design. Use something flat to rub the design firmly so it sticks to the back of the transfer tape. Peel off the vinyl backing and you’re left with a clear sheet with your beautiful design!
- Sometimes, the vinyl doesn’t want to let go of the original sheet. You can use the weeding tool or a small spatula to gently lift them up to the transfer tape.
Pop your newly weeded and transfer taped design on your journal and give it a good press down again. Peel back the transfer tape and you’re all set! Rinse, repeat with the rest of the designs you’ve cut out.
- Pro tip: the transfer tape can be reused quite a bit. You can cut it to size for the other pieces of the design or use the sheet as a whole. Use the discarded vinyl backing to store it until you need to use it again

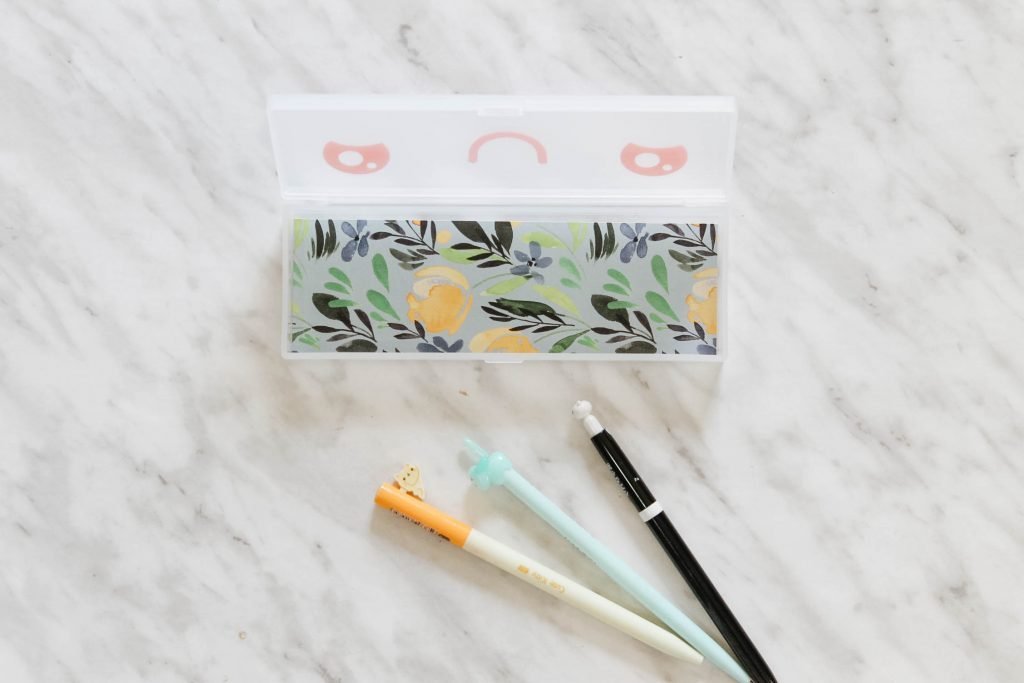
For our pencil case, we wanted to keep it relatively simple so you’ll find the image we used in the Journal DIY set. However, if you want to change you can search through the thousands of images available on Design Space. Or, just use a name to identify who’s amazing new pencil case it is.
For our pencil case, we used the “Joyful Kawaii Faces” image set in Design Space. You can find this by clicking on “Images” in your design and searching the image set name. Pick whichever ones you like and click insert. You can change the size, orientation and more. I then lined the inside of the case with some Adhesive Backed Paper that shows through when it’s closed and we were done!
That’s it! You’re all done. Alivia was so excited to see the final project! We’re already brainstorming how we’re going to make this a weekly activity. The Cricut Joy is so compact that we’ve added it to the bookshelf in Alivia’s homeschooling area. We’ll be creating projects each week to add to our journal including special drawing prompts, activities, scavenger hunts, and more.
Hopefully, you’ll join me in creating some fun projects over the summer. I’d love to see if you create a journal as well so we can share ideas on what to add inside.
If you’re considering the Cricut Joy, I highly recommend checking out the Cricut website!You’ll find tons of information about its incredible capabilities. As well as the full line of products that can keep you crafting all day, on the go, or even while you travel.
What’s the first thing YOU’D make with the Cricut Joy?
