This is a sponsored conversation written by me on behalf of Cricut. The opinions and text are all mine.
It’s hard to believe the holiday season is creeping up on us so quickly! I’ve spent the better part of the year planning out everyone’s gifts. I’m pretty excited for some of the fun DIY projects we’ll be sharing with friends and family this year. We just recently received the Cricut Easy Press from the team at Cricut.com and hilarity ensued! When I shared with Eschelle from @mumfection that we had an EasyPress on its way, she immediately had a project idea that had to happen and we’re excited to share it with you! Maybe you to have someone who loves to create recipes with a smoker at home as well?
Does anyone else have one of those impossible to shop for in-laws? The ones who have everything, and if they don’t already have it, they’ll just buy it for themselves anyway? They make holiday shopping challenging when you want to surprise them. That’s why we’re excited about so many DIY projects we can make that are personalized and bring some laughs to the gift exchange.
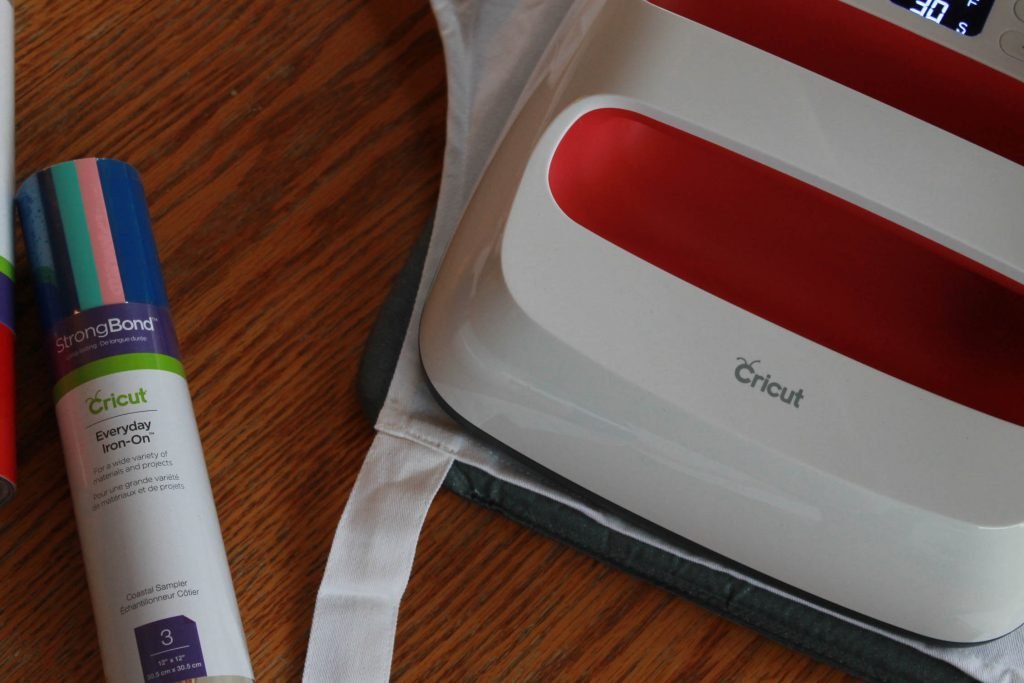
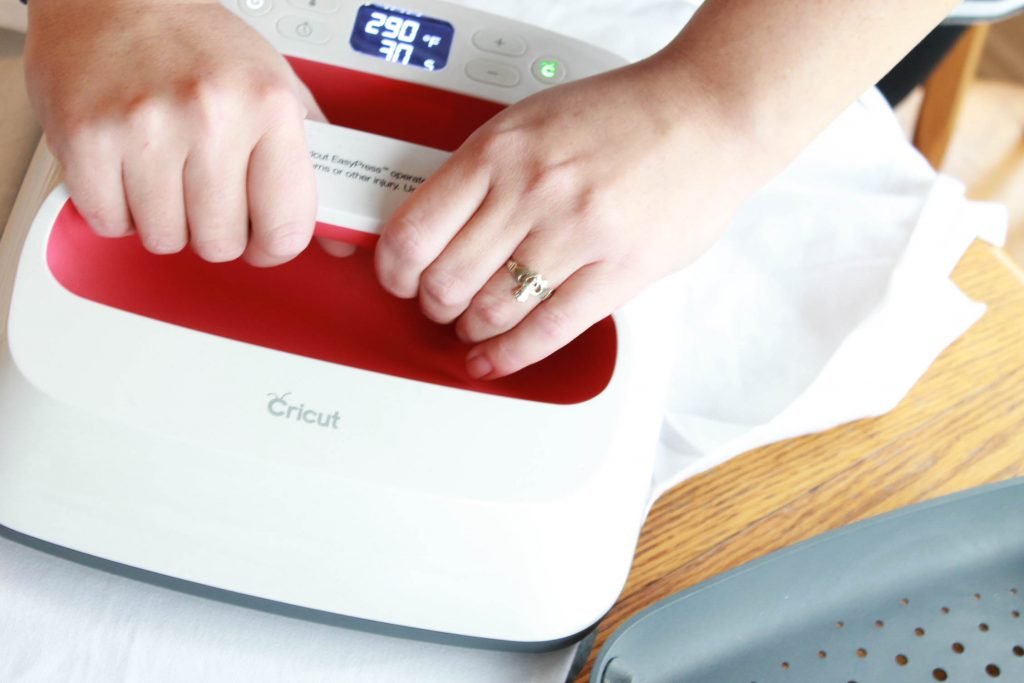
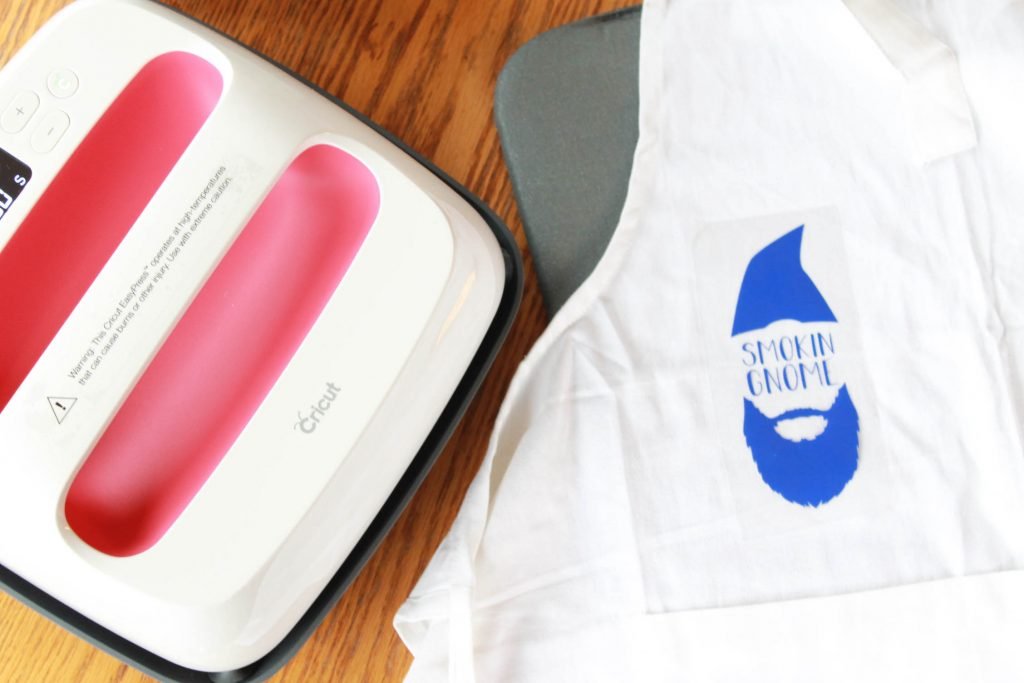
This was my first time using the Everyday Iron-on Vinyl and the EasyPress, and we actually managed to do it with NO hiccups! Easy, peasy, tiny apron squeezy. At first, I wasn’t quite sure what an EasyPress actually was, but a quick unboxing and I figured it out. The short answer is, the EasyPress is a temperature-controlled iron that you place over your project, hold down, and release. You don’t have to worry about burning projects, or your table, it distributes the heat evenly across its surface and makes iron-on/infusable ink projects a breeze!
The Cricut EasyPress comes in 4 convienient sizes that make projects of all sizes easy, from the mini right up to 12×10″. The EasyPress also comes with the heatsafe tray for pre-heating and letting it cool down, but you will want to have either a Cricut EasyPress mat on hand, an ironing mat or a stack of towels to protect your surface. One of my favourite features is definitely the auto-shut off, once you set the amount of time you’d like to heat for, you don’t need to worry about forgetting to turn it off. I’m a bit scatterbrained some days so this is a feature that makes me feel a lot more confident to use the EasyPress.
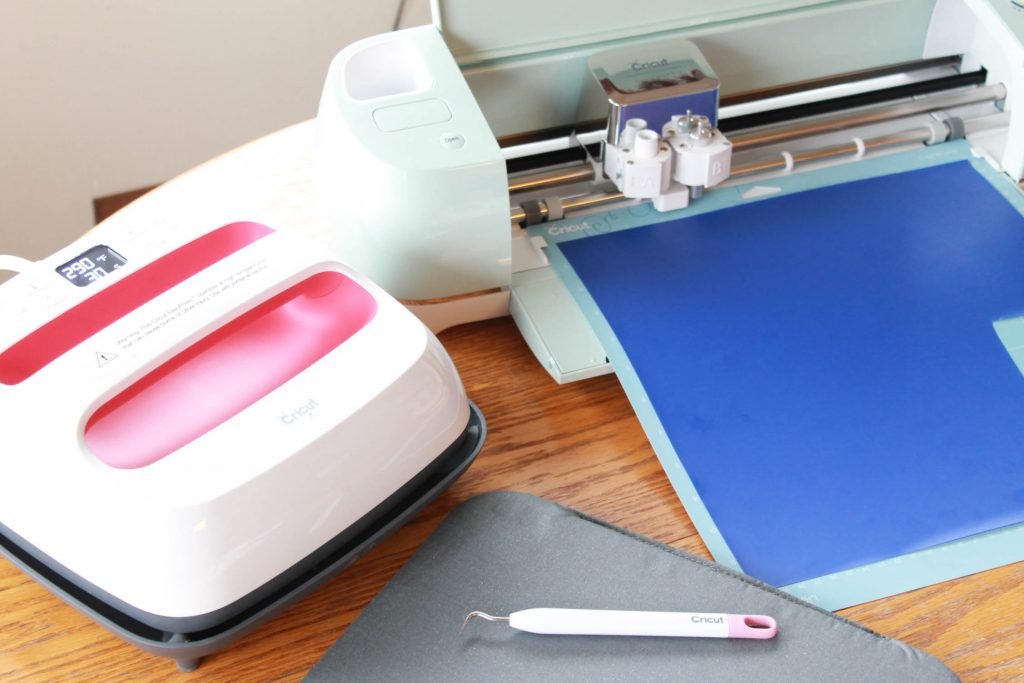
Once we created our Smokin’ Gnome easily in Cricut Design Space it was just a matter of cutting it out on our Cricut Explore Air™ 2 machine. Some important things to note are you’ll want to mirror your design before cutting and make sure to attach your iron-on vinyl good side down to your cutting mat, or you’ll end up with a reverse, not iron-able design!
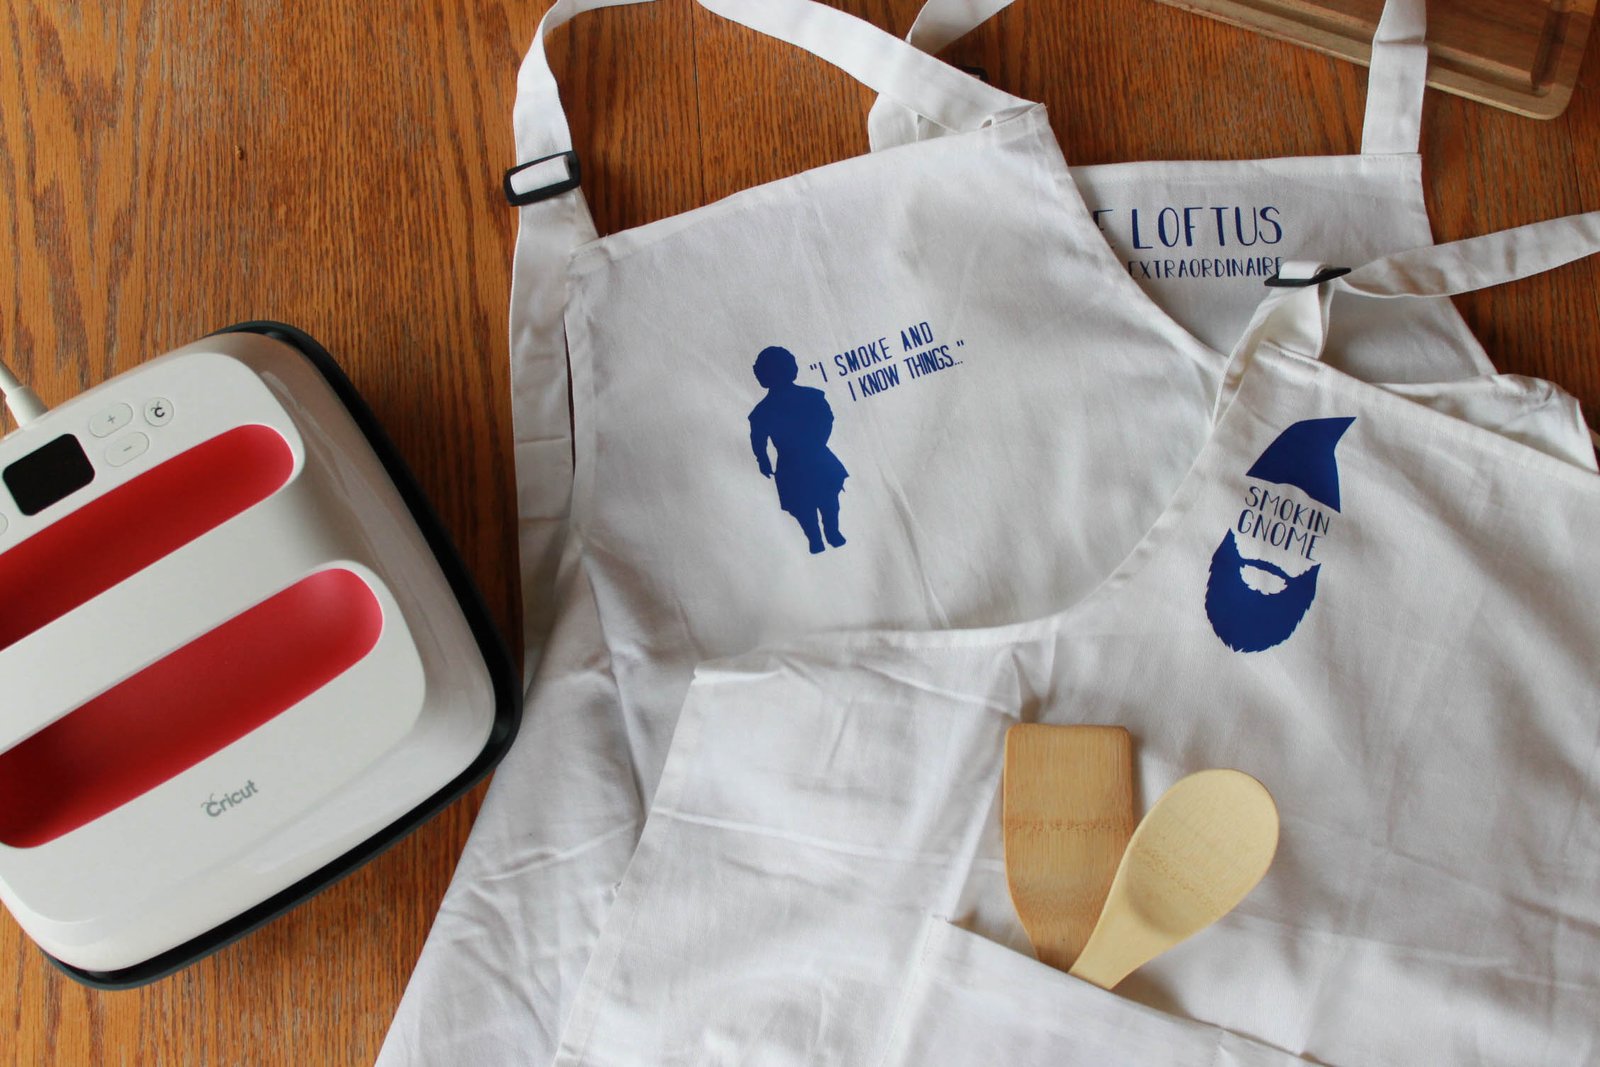
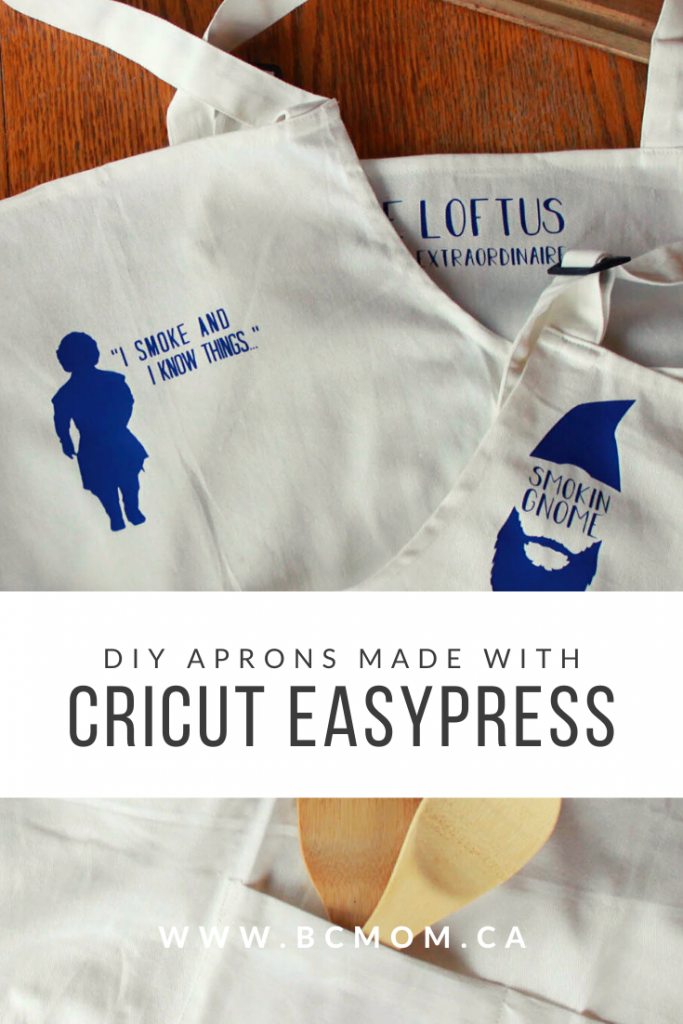
We decided that one gift wasn’t enough and decided that since the first one was so easy to make that we were going to go for a trifecta of aprons. You see, the gift recipient was gifted with a meat smoker last year and loves to smoke all the things for family dinners. He’d surely need more than one apron!

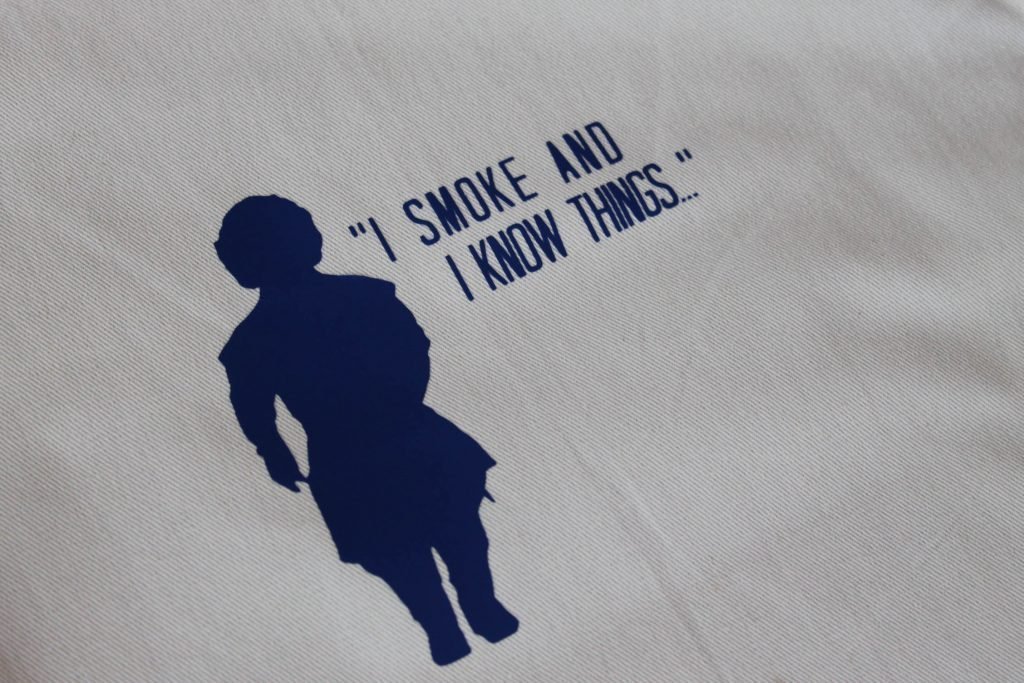
With this being our first time using the EasyPress, we opted to go with what we had on hand which was the Everyday Iron-on vinyl in navy and cotton aprons, you may want to find a polyester blend or infusable ink if you’re planning to wash/dry these as the vinyl can lift. Our gift recipient has opted to hang to dry so we’re good!

From start to finish, this project was full of laughter and giggles as we gathered around the table to create. Eschelle loved knowing that there was no possible way her father in law would have ever been able to buy these for himself and the grandkids loved giving a one of a kind gift.
What you’ll need for this Cricut EasyPress project:
- Cricut Machine – We used the Explore Air2
- The Cricut EasyPress – any size will do, we used the EasyPress 2 9×9
- A Cricut EasyPress Mat or heat safe mat to cover your surface
- Design Space
- Smokin’ Gnome SVG file (get yours here!)
- Weeding tool
- Aprons of your choice
- Download your SVG file and open in Design Space
- Adjust your sizing to fit where you’d like on your apron (pro tip: use the mat ruler guides to help!)
- Attach your Everyday Iron-On vinyl upside down on your Cricut cutting mat
- Mirror your image if not done already
- Cut out your design on your Cricut machine
- Start preheating your Cricut EasyPress (we used 290 degrees)
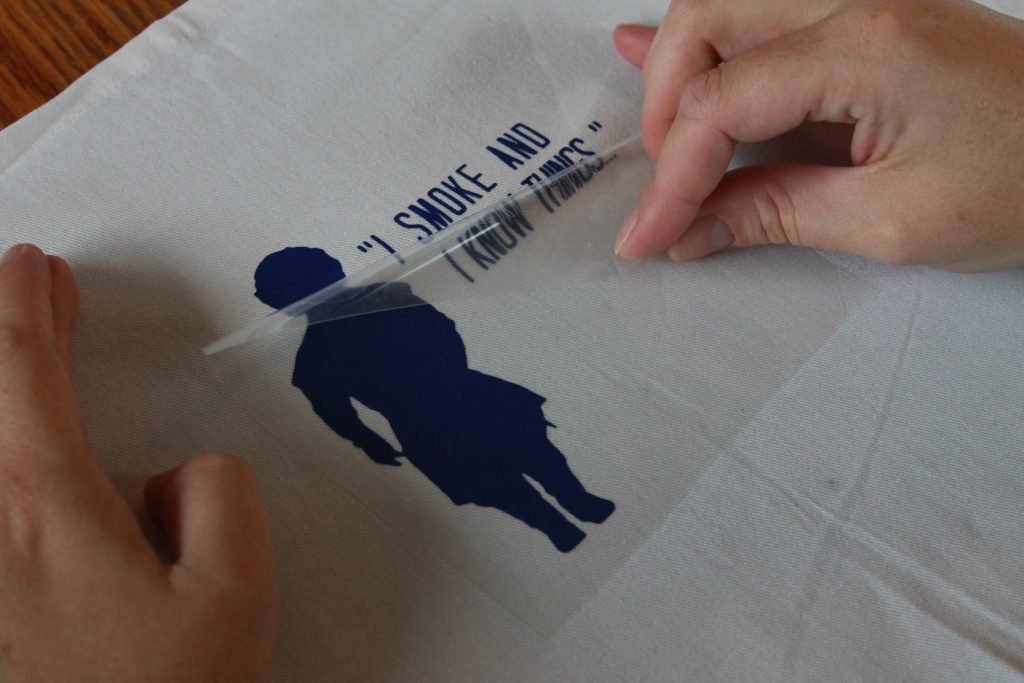
- Peel back extra vinyl to reveal your finished design
- Weed out any little extra bits of vinyl from between the letters
- Place your apron down on your EasyPress Mat or heat-safe surface
- Arrange your design down on your apron where you’re happy with it
- Place your EasyPress down on top of your design
- Press down firmly for 20-30 seconds
- Slowly peel the backing off
- Revel in your crafty amazingness

Once you get the hang of creating things, the possibilities are endless! We definitely think the Cricut EasyPress is an important addition to your Cricut at home family and really helps you make projects quicker, more professionally and stress-free!
Love it? Make sure to pin this project for later and Check out our Cricut Halloween Bag Toppers for more Cricut crafts!
Now who’s going to make me a blogger extraordinaire apron…